Convert OLM to PST Format on Windows in 5 Steps
Converting Olm to Pst format is generally considered to be a long and complicated process. If you are jumping onto the task manually, it's going to be even more complex and time consuming.
On the other hand, if you are using a third party file converter, it can be made easy and quick. However, it's important to choose the software wisely.
“Olm to Pst Converter Pro” is a perfect tool for this. The reason being its revolutionary interface that lets users convert the files in simple 5 steps.

Step1 – Choose Olm files.
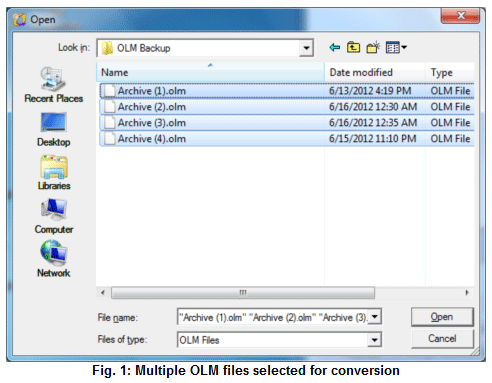
As soon as you launch the tool, it automatically opens up a dialog box where you can navigate to the folder where you have saved your Olm file or files. Select them and click “open”.

Step 2 – Choose Folders for Conversion
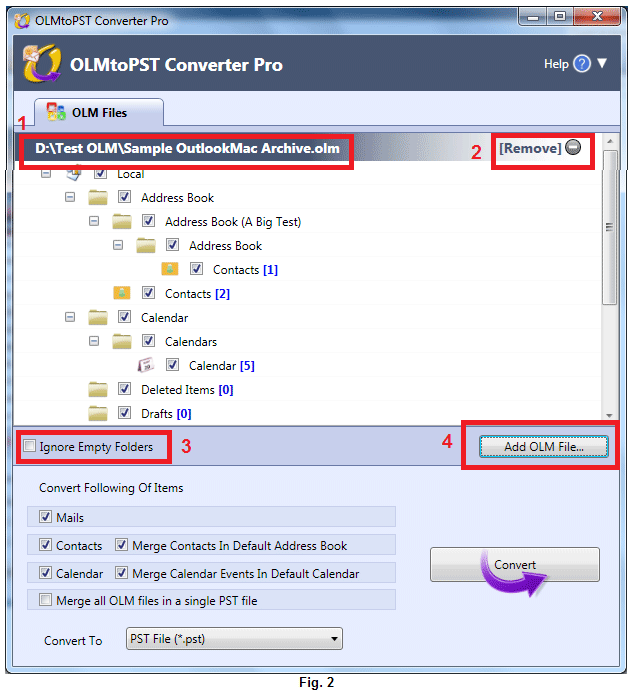
After you open Olm files, the tool displays all the folders inside them. By default, all the folders will be checked for conversion. Uncheck the ones you want to exclude and don't want to be converted to Pst.
If you chose the wrong Olm file, click on “remove” on the top right corner to remove that file. Then, click on “Add Olm file” (number 4 in the fig. above) to add the correct file.
You can also ignore empty folders by checking the box shown as number 3 in the figure above.
“Olm to Pst Converter Pro” allows to load multiple Olm files together.
Step 3 – Filter mails, contacts, and calendar
As stated above, you can manually check or uncheck the folders you want to convert or not. But you can also automatically select mails, contacts, and/or calendar to convert by checking the appropriate box as shown in the fig above.
If you manually check the folders for conversion, this section will itself reflect your selection. For instance, if you didn't select any folders with mails, the filter box here for mails will show unchecked, as shown in the icon here →
If there are no mails folder in the Olm files, it will show 'disabled' →
If all mail folders are selected, it will show →
If some of the mail folders are selected (not all) it will show →

Step 4 – Merging Data
There are three types of merging you can do.
• Merge all contacts in default Address Book
• Merge Calendar Events in Default Calendar
• Merge all Olm files in a single Pst file

Step 5 – Click “Convert”
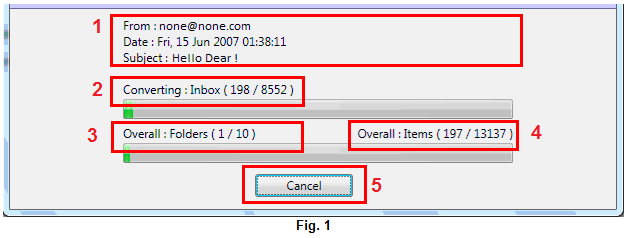
After you click “Convert”, the tool will start converting the files, and will show you the progress (as shown in fig below) →

You can cancel it at any time, if you want.
Once the conversion is finished, you will get the confirmation dialog box, with the link to directly open the folder where it saved the converted Pst file.
“Olm to Pst Converter Pro” has simplified Olm to Pst conversion a lot. In only 5 simple steps, you can now effortlessly convert your files.
